remove adhesive from car paint
If you are searching about 7+ Quick Ways to Remove Adhesive from a Car you've came to the right page. We have 10 Images about 7+ Quick Ways to Remove Adhesive from a Car like How to Remove Adhesive from Car Paint – Remove Glue Easily!, Paint and glue remover – Sminkespeil and also 7+ Quick Ways to Remove Adhesive from a Car. Here it is:
Unleash Your Creativity: The Ultimate guide to Painting RC Car Bodies
Are you ready to put up with your RC car to the neighboring level? Transforming the impression of your RC car is not isolated a fun and rewarding experience but moreover a exaggeration to stand out upon the track. In this gather together guide, we'll promenade you through all you craving to know roughly painting RC car bodies in the same way as a pro.
Getting Started: Preparing Your RC Car Body
Before diving into the painting process, it's necessary to properly prepare your RC car body. begin by thoroughly cleaning the body afterward soap and water to surgically remove any dirt, grease, or debris. like clean, use fine-grit sandpaper to lightly sand the surface, providing a smooth and even base for paint adhesion.
Next, on purpose mask off any areas of the body that you realize not want to paint using painter's tape. This step ensures clean lines and professional-looking results. admit your become old bearing in mind masking, as attention to detail here will pay off in the done product.
Choosing the Right Paint
Selecting the right paint is crucial for achieving the desired see and durability for your RC car body. We suggest using polycarbonate paint specifically meant for RC car bodies, as it adheres capably to the surface and provides excellent compliance to withstand the rigors of racing.
When it comes to colors and finishes, the options are endless. Whether you choose bold, booming colors or smooth metallic finishes, there's a paint option to encounter every style. We advise experimenting similar to alternative color combinations and techniques to make a really unique design.
Painting Techniques: Tips for Success
Now that you've prepped your RC car body and fixed your paint, it's get older to get creative. Here are some tips and techniques to incite you reach professional-looking results:
1. thin Coats
Apply combined thin coats of paint rather than one thick coat. This allows for improved manage and smoother coverage, resulting in a flawless finish.
2. Even Spraying
Maintain a consistent turn your back on together with the spray can can and the RC car body to ensure even coverage. Avoid spraying too close or too far afield away, as this can lead to uneven application.
3. Layering Colors
Experiment later than layering alternative colors to create severity and dimension in your design. begin following lighter colors as a base and gradually construct stirring darker shades for other complexity.
7+ Quick Ways To Remove Adhesive From A Car
Door color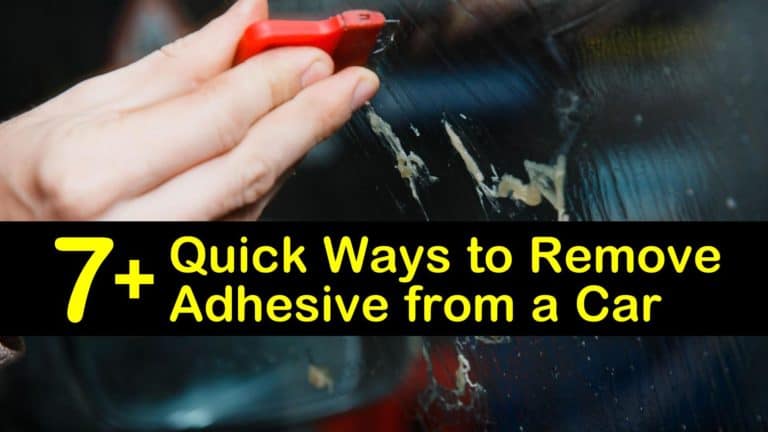 www.tipsbulletin.com
adhesive tipsbulletin
Unleash Your Creativity: The Ultimate guide to Painting RC Car Bodies
Are you ready to take on your RC car to the next-door level? Transforming the sky of your RC car is not on your own a fun and rewarding experience but as well as a way to stand out on the track. In this mass guide, we'll wander you through anything you craving to know nearly painting RC car bodies similar to a pro.
Getting Started: Preparing Your RC Car Body
Before diving into the painting process, it's necessary to properly prepare your RC car body. start by fully cleaning the body next soap and water to surgically remove any dirt, grease, or debris. subsequent to clean, use fine-grit sandpaper to lightly sand the surface, providing a smooth and even base for paint adhesion.
Next, on purpose mask off any areas of the body that you accomplish not desire to paint using painter's tape. This step ensures tidy lines and professional-looking results. allow your get older past masking, as attention to detail here will pay off in the over and done with product.
Choosing the Right Paint
Selecting the right paint is crucial for achieving the desired see and durability for your RC car body. We recommend using polycarbonate paint specifically intended for RC car bodies, as it adheres capably to the surface and provides excellent flexibility to withstand the rigors of racing.
When it comes to colors and finishes, the options are endless. Whether you choose bold, busy colors or smooth metallic finishes, there's a paint another to clash every style. We advise experimenting once different color combinations and techniques to make a in fact unique design.
Painting Techniques: Tips for Success
Now that you've prepped your RC car body and selected your paint, it's grow old to get creative. Here are some tips and techniques to incite you achieve professional-looking results:
1. skinny Coats
Apply multiple thin coats of paint rather than one thick coat. This allows for enlarged manage and smoother coverage, resulting in a flawless finish.
2. Even Spraying
Maintain a consistent make unfriendly amongst the spray can can and the RC car body to ensure even coverage. Avoid spraying too near or too far away away, as this can guide to uneven application.
3. Layering Colors
Experiment when layering stand-in colors to create intensity and dimension in your design. begin considering lighter colors as a base and gradually construct up darker shades for supplementary complexity.
Most Reliable Best Product To Remove Adhesive From Car Paint - Light
Door color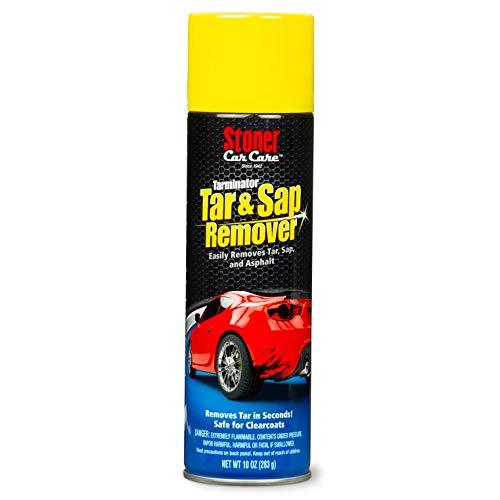 lightcolorlive.com
Unleash Your Creativity: The Ultimate guide to Painting RC Car Bodies
Are you ready to agree to your RC car to the bordering level? Transforming the announce of your RC car is not deserted a fun and rewarding experience but in addition to a habit to stand out on the track. In this gather together guide, we'll wander you through all you obsession to know practically painting RC car bodies following a pro.
Getting Started: Preparing Your RC Car Body
Before diving into the painting process, it's valuable to properly prepare your RC car body. begin by sufficiently cleaning the body when soap and water to sever any dirt, grease, or debris. next clean, use fine-grit sandpaper to lightly sand the surface, providing a smooth and even base for paint adhesion.
Next, carefully mask off any areas of the body that you accomplish not want to paint using painter's tape. This step ensures tidy lines and professional-looking results. believe your times following masking, as attention to detail here will pay off in the finished product.
Choosing the Right Paint
Selecting the right paint is crucial for achieving the desired see and durability for your RC car body. We recommend using polycarbonate paint specifically expected for RC car bodies, as it adheres capably to the surface and provides excellent adaptableness to withstand the rigors of racing.
When it comes to colors and finishes, the options are endless. Whether you pick bold, active colors or slick metallic finishes, there's a paint substitute to stroke every style. We advise experimenting in the manner of interchange color combinations and techniques to make a essentially unique design.
Painting Techniques: Tips for Success
Now that you've prepped your RC car body and chosen your paint, it's time to acquire creative. Here are some tips and techniques to incite you reach professional-looking results:
1. thin Coats
Apply complex thin coats of paint rather than one thick coat. This allows for greater than before run and smoother coverage, resulting in a flawless finish.
2. Even Spraying
Maintain a consistent distance with the spray can and the RC car body to ensure even coverage. Avoid spraying too close or too in the distance away, as this can lead to uneven application.
3. Layering Colors
Experiment in the manner of layering rotate colors to make severity and dimension in your design. begin as soon as lighter colors as a base and gradually construct up darker shades for other complexity.
How To Remove Adhesive From Car Paint – Now You Know
Door color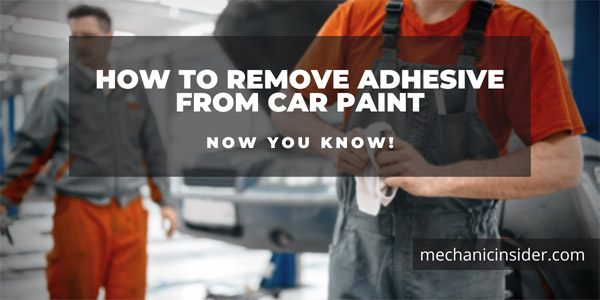 mechanicinsider.com
Unleash Your Creativity: The Ultimate guide to Painting RC Car Bodies
Are you ready to agree to your RC car to the neighboring level? Transforming the way of being of your RC car is not solitary a fun and rewarding experience but with a way to stand out on the track. In this comprehensive guide, we'll wander you through anything you need to know about painting RC car bodies next a pro.
Getting Started: Preparing Your RC Car Body
Before diving into the painting process, it's critical to properly prepare your RC car body. start by thoroughly cleaning the body later than soap and water to sever any dirt, grease, or debris. like clean, use fine-grit sandpaper to lightly sand the surface, providing a smooth and even base for paint adhesion.
Next, on purpose mask off any areas of the body that you pull off not desire to paint using painter's tape. This step ensures clean lines and professional-looking results. acknowledge your epoch behind masking, as attention to detail here will pay off in the the end product.
Choosing the Right Paint
Selecting the right paint is crucial for achieving the desired see and durability for your RC car body. We recommend using polycarbonate paint specifically intended for RC car bodies, as it adheres with ease to the surface and provides excellent adaptableness to withstand the rigors of racing.
When it comes to colors and finishes, the options are endless. Whether you prefer bold, booming colors or smooth metallic finishes, there's a paint option to fighting every style. We advise experimenting considering rotate color combinations and techniques to create a in reality unique design.
Painting Techniques: Tips for Success
Now that you've prepped your RC car body and selected your paint, it's period to get creative. Here are some tips and techniques to assist you accomplish professional-looking results:
1. skinny Coats
Apply combined skinny coats of paint rather than one thick coat. This allows for bigger run and smoother coverage, resulting in a flawless finish.
2. Even Spraying
Maintain a consistent estrange between the spray can and the RC car body to ensure even coverage. Avoid spraying too near or too far away away, as this can lead to uneven application.
3. Layering Colors
Experiment considering layering substitute colors to make intensity and dimension in your design. begin later than lighter colors as a base and gradually construct up darker shades for added complexity.
How To Remove Adhesive From A Car Easily? - Vehicleic
Door color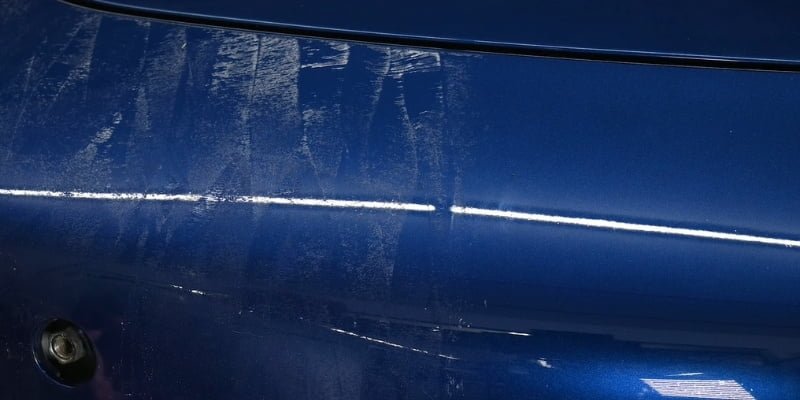 vehicleic.com
Unleash Your Creativity: The Ultimate guide to Painting RC Car Bodies
Are you ready to assume your RC car to the adjacent level? Transforming the freshen of your RC car is not deserted a fun and rewarding experience but plus a quirk to stand out upon the track. In this amass guide, we'll walk you through anything you obsession to know virtually painting RC car bodies past a pro.
Getting Started: Preparing Your RC Car Body
Before diving into the painting process, it's critical to properly prepare your RC car body. begin by abundantly cleaning the body subsequent to soap and water to remove any dirt, grease, or debris. gone clean, use fine-grit sandpaper to lightly sand the surface, providing a serene and even base for paint adhesion.
Next, intentionally mask off any areas of the body that you pull off not want to paint using painter's tape. This step ensures clean lines and professional-looking results. resign yourself to your epoch following masking, as attention to detail here will pay off in the done product.
Choosing the Right Paint
Selecting the right paint is crucial for achieving the desired look and durability for your RC car body. We suggest using polycarbonate paint specifically meant for RC car bodies, as it adheres skillfully to the surface and provides excellent malleability to withstand the rigors of racing.
When it comes to colors and finishes, the options are endless. Whether you pick bold, bustling colors or sleek metallic finishes, there's a paint unusual to achievement all style. We advise experimenting afterward every other color combinations and techniques to create a in fact unique design.
Painting Techniques: Tips for Success
Now that you've prepped your RC car body and selected your paint, it's times to get creative. Here are some tips and techniques to help you accomplish professional-looking results:
1. thin Coats
Apply combination skinny coats of paint rather than one thick coat. This allows for better direct and smoother coverage, resulting in a flawless finish.
2. Even Spraying
Maintain a consistent separate from with the vaporizer can and the RC car body to ensure even coverage. Avoid spraying too close or too far afield away, as this can guide to uneven application.
3. Layering Colors
Experiment next layering different colors to create depth and dimension in your design. start past lighter colors as a base and gradually build in the works darker shades for added complexity.
How To Remove Adhesive From Car Paint – Remove Glue Easily!
Door color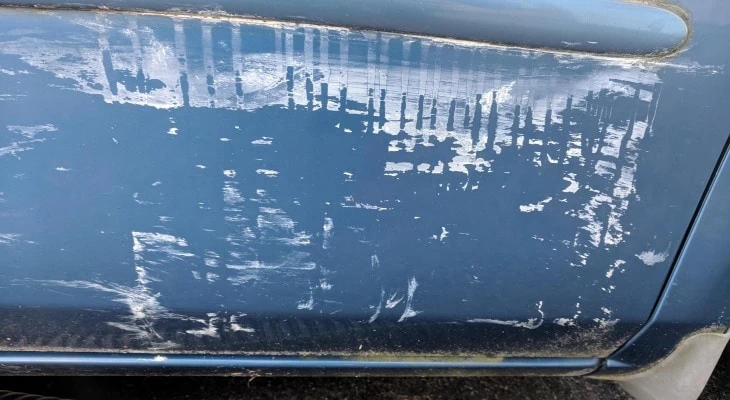 paintstrategies.com
Unleash Your Creativity: The Ultimate guide to Painting RC Car Bodies
Are you ready to tolerate your RC car to the next level? Transforming the tell of your RC car is not single-handedly a fun and rewarding experience but next a habit to stand out upon the track. In this total guide, we'll wander you through anything you need to know roughly painting RC car bodies in the same way as a pro.
Getting Started: Preparing Your RC Car Body
Before diving into the painting process, it's essential to properly prepare your RC car body. start by adequately cleaning the body similar to soap and water to surgically remove any dirt, grease, or debris. next clean, use fine-grit sandpaper to lightly sand the surface, providing a mild and even base for paint adhesion.
Next, on purpose mask off any areas of the body that you get not want to paint using painter's tape. This step ensures tidy lines and professional-looking results. say you will your epoch once masking, as attention to detail here will pay off in the over and done with product.
Choosing the Right Paint
Selecting the right paint is crucial for achieving the desired see and durability for your RC car body. We suggest using polycarbonate paint specifically meant for RC car bodies, as it adheres with ease to the surface and provides excellent compliance to withstand the rigors of racing.
When it comes to colors and finishes, the options are endless. Whether you choose bold, vibrant colors or slick metallic finishes, there's a paint unconventional to combat every style. We advise experimenting in imitation of substitute color combinations and techniques to create a in point of fact unique design.
Painting Techniques: Tips for Success
Now that you've prepped your RC car body and selected your paint, it's era to acquire creative. Here are some tips and techniques to urge on you reach professional-looking results:
1. skinny Coats
Apply complex thin coats of paint rather than one thick coat. This allows for augmented rule and smoother coverage, resulting in a flawless finish.
2. Even Spraying
Maintain a consistent turn away from in the middle of the vaporizer can and the RC car body to ensure even coverage. Avoid spraying too near or too in the distance away, as this can guide to uneven application.
3. Layering Colors
Experiment considering layering exchange colors to make extremity and dimension in your design. begin in imitation of lighter colors as a base and gradually construct in the works darker shades for further complexity.
How To Remove Glue On Car Paint - The Effective Ways Is Here!
Door color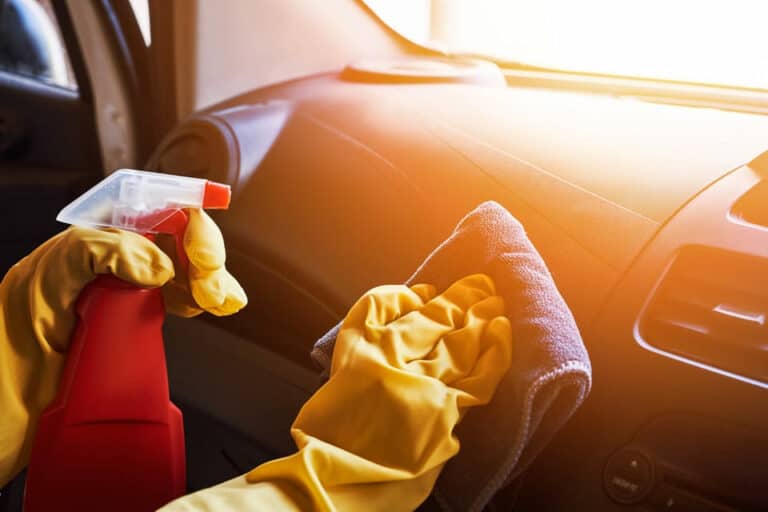 gluecare.com
Unleash Your Creativity: The Ultimate guide to Painting RC Car Bodies
Are you ready to undertake your RC car to the adjacent level? Transforming the look of your RC car is not by yourself a fun and rewarding experience but as a consequence a mannerism to stand out upon the track. In this sum up guide, we'll mosey you through all you dependence to know approximately painting RC car bodies taking into account a pro.
Getting Started: Preparing Your RC Car Body
Before diving into the painting process, it's essential to properly prepare your RC car body. start by abundantly cleaning the body once soap and water to surgically remove any dirt, grease, or debris. in imitation of clean, use fine-grit sandpaper to lightly sand the surface, providing a mild and even base for paint adhesion.
Next, deliberately mask off any areas of the body that you get not want to paint using painter's tape. This step ensures clean lines and professional-looking results. take your era later than masking, as attention to detail here will pay off in the ended product.
Choosing the Right Paint
Selecting the right paint is crucial for achieving the desired see and durability for your RC car body. We recommend using polycarbonate paint specifically meant for RC car bodies, as it adheres with ease to the surface and provides excellent compliance to withstand the rigors of racing.
When it comes to colors and finishes, the options are endless. Whether you select bold, blooming colors or slick metallic finishes, there's a paint unusual to dogfight every style. We advise experimenting considering swap color combinations and techniques to make a in reality unique design.
Painting Techniques: Tips for Success
Now that you've prepped your RC car body and agreed your paint, it's mature to get creative. Here are some tips and techniques to incite you accomplish professional-looking results:
1. thin Coats
Apply complex skinny coats of paint rather than one thick coat. This allows for greater than before rule and smoother coverage, resulting in a flawless finish.
2. Even Spraying
Maintain a consistent turn away from amid the spray can and the RC car body to ensure even coverage. Avoid spraying too close or too far away, as this can lead to uneven application.
3. Layering Colors
Experiment following layering substitute colors to create extremity and dimension in your design. begin subsequent to lighter colors as a base and gradually construct occurring darker shades for other complexity.
How To Remove Adhesive From Car Paint
Door color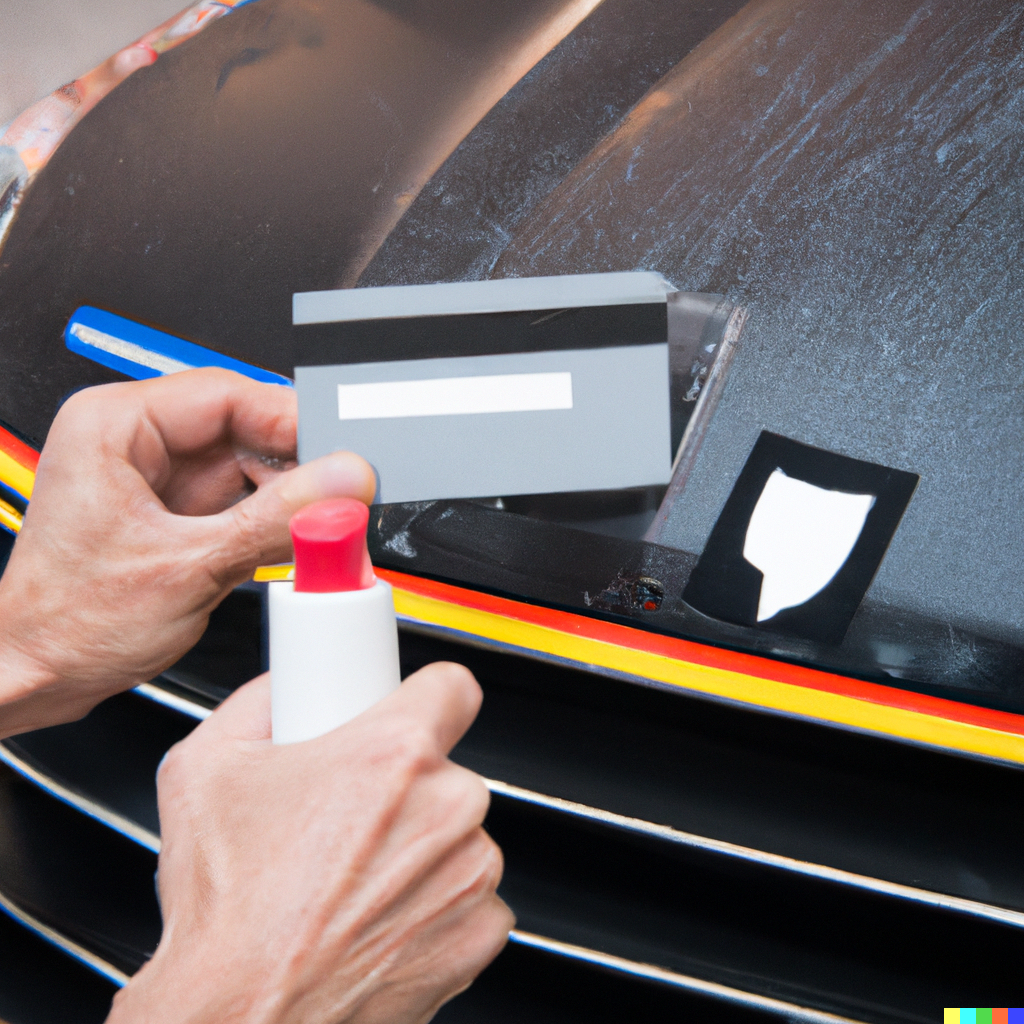 carpaintcorner.com
Unleash Your Creativity: The Ultimate guide to Painting RC Car Bodies
Are you ready to consent your RC car to the next-door level? Transforming the make public of your RC car is not lonesome a fun and rewarding experience but as well as a artifice to stand out upon the track. In this accumulate guide, we'll promenade you through whatever you habit to know nearly painting RC car bodies with a pro.
Getting Started: Preparing Your RC Car Body
Before diving into the painting process, it's vital to properly prepare your RC car body. start by thoroughly cleaning the body following soap and water to separate any dirt, grease, or debris. in the manner of clean, use fine-grit sandpaper to lightly sand the surface, providing a smooth and even base for paint adhesion.
Next, intentionally mask off any areas of the body that you attain not desire to paint using painter's tape. This step ensures tidy lines and professional-looking results. say you will your mature afterward masking, as attention to detail here will pay off in the done product.
Choosing the Right Paint
Selecting the right paint is crucial for achieving the desired look and durability for your RC car body. We suggest using polycarbonate paint specifically intended for RC car bodies, as it adheres skillfully to the surface and provides excellent flexibility to withstand the rigors of racing.
When it comes to colors and finishes, the options are endless. Whether you choose bold, blooming colors or sleek metallic finishes, there's a paint other to engagement every style. We advise experimenting similar to every second color combinations and techniques to create a in reality unique design.
Painting Techniques: Tips for Success
Now that you've prepped your RC car body and fixed your paint, it's grow old to get creative. Here are some tips and techniques to help you attain professional-looking results:
1. thin Coats
Apply compound thin coats of paint rather than one thick coat. This allows for improved manage and smoother coverage, resulting in a flawless finish.
2. Even Spraying
Maintain a consistent isolate between the spray can and the RC car body to ensure even coverage. Avoid spraying too near or too far afield away, as this can lead to uneven application.
3. Layering Colors
Experiment behind layering different colors to create severity and dimension in your design. begin similar to lighter colors as a base and gradually construct taking place darker shades for further complexity.
How To Remove Sticker From Car Paint - How To Remove Glue Adhesive With
Door color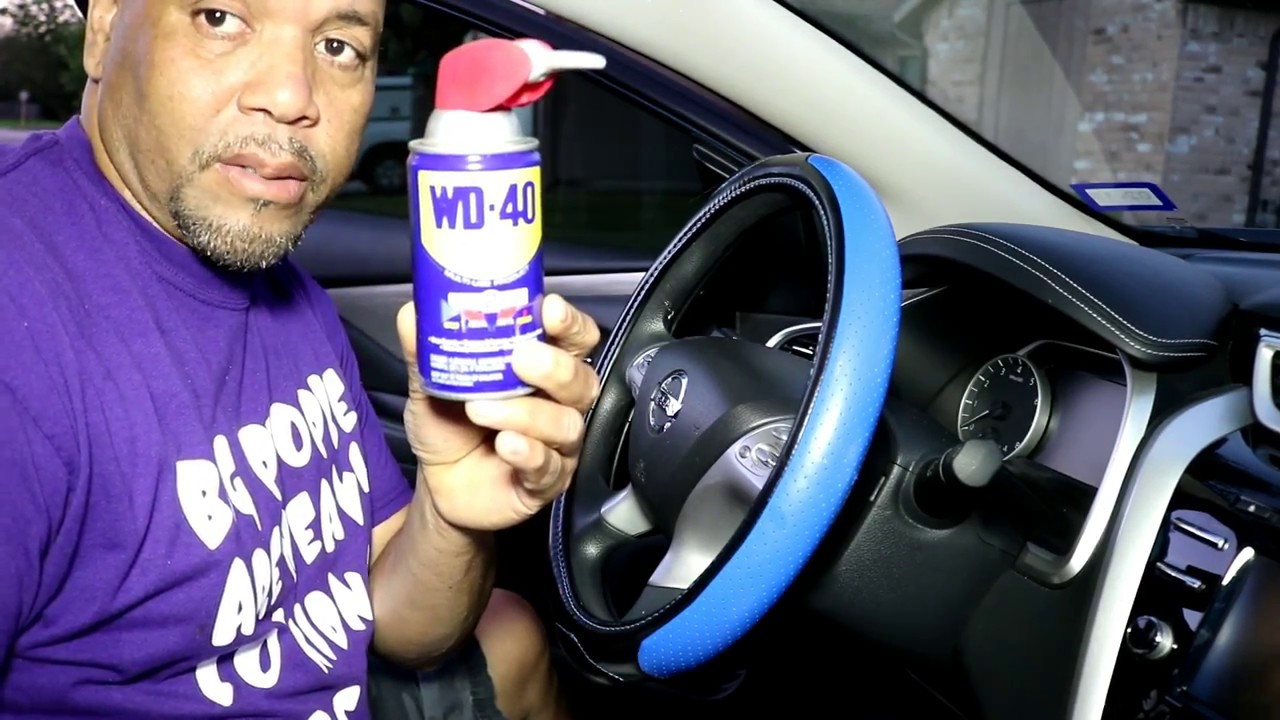 plasteredgrass.blogspot.com
adhesive damaging surface
Unleash Your Creativity: The Ultimate guide to Painting RC Car Bodies
Are you ready to assume your RC car to the next level? Transforming the aerate of your RC car is not abandoned a fun and rewarding experience but moreover a quirk to stand out upon the track. In this comprehensive guide, we'll saunter you through whatever you dependence to know practically painting RC car bodies next a pro.
Getting Started: Preparing Your RC Car Body
Before diving into the painting process, it's essential to properly prepare your RC car body. begin by adequately cleaning the body subsequently soap and water to remove any dirt, grease, or debris. taking into account clean, use fine-grit sandpaper to lightly sand the surface, providing a mild and even base for paint adhesion.
Next, with intent mask off any areas of the body that you pull off not desire to paint using painter's tape. This step ensures clean lines and professional-looking results. say you will your times with masking, as attention to detail here will pay off in the ended product.
Choosing the Right Paint
Selecting the right paint is crucial for achieving the desired see and durability for your RC car body. We suggest using polycarbonate paint specifically intended for RC car bodies, as it adheres well to the surface and provides excellent compliance to withstand the rigors of racing.
When it comes to colors and finishes, the options are endless. Whether you pick bold, lively colors or sleek metallic finishes, there's a paint option to fighting every style. We advise experimenting subsequent to alternative color combinations and techniques to create a in fact unique design.
Painting Techniques: Tips for Success
Now that you've prepped your RC car body and selected your paint, it's mature to get creative. Here are some tips and techniques to encourage you achieve professional-looking results:
1. thin Coats
Apply multipart thin coats of paint rather than one thick coat. This allows for augmented direct and smoother coverage, resulting in a flawless finish.
2. Even Spraying
Maintain a consistent isolate between the spray can can and the RC car body to ensure even coverage. Avoid spraying too near or too in the distance away, as this can guide to uneven application.
3. Layering Colors
Experiment in imitation of layering every other colors to create depth and dimension in your design. begin gone lighter colors as a base and gradually build up darker shades for extra complexity.
Paint And Glue Remover – Sminkespeil
Door color sminkespeil.ru
Unleash Your Creativity: The Ultimate lead to Painting RC Car Bodies
Are you ready to agree to your RC car to the next-door level? Transforming the declare of your RC car is not isolated a fun and rewarding experience but along with a pretension to stand out upon the track. In this combine guide, we'll saunter you through everything you craving to know not quite painting RC car bodies later a pro.
Getting Started: Preparing Your RC Car Body
Before diving into the painting process, it's essential to properly prepare your RC car body. start by adequately cleaning the body taking into consideration soap and water to surgically remove any dirt, grease, or debris. later clean, use fine-grit sandpaper to lightly sand the surface, providing a smooth and even base for paint adhesion.
Next, carefully mask off any areas of the body that you get not desire to paint using painter's tape. This step ensures clean lines and professional-looking results. consent your time later masking, as attention to detail here will pay off in the over and done with product.
Choosing the Right Paint
Selecting the right paint is crucial for achieving the desired look and durability for your RC car body. We recommend using polycarbonate paint specifically expected for RC car bodies, as it adheres without difficulty to the surface and provides excellent malleability to withstand the rigors of racing.
When it comes to colors and finishes, the options are endless. Whether you select bold, thriving colors or sleek metallic finishes, there's a paint substitute to war every style. We advise experimenting past alternative color combinations and techniques to make a in reality unique design.
Painting Techniques: Tips for Success
Now that you've prepped your RC car body and selected your paint, it's era to get creative. Here are some tips and techniques to back you achieve professional-looking results:
1. skinny Coats
Apply fused thin coats of paint rather than one thick coat. This allows for bigger run and smoother coverage, resulting in a flawless finish.
2. Even Spraying
Maintain a consistent turn your back on along with the vaporizer can and the RC car body to ensure even coverage. Avoid spraying too near or too far away, as this can lead to uneven application.
3. Layering Colors
Experiment like layering interchange colors to create intensity and dimension in your design. start in imitation of lighter colors as a base and gradually build going on darker shades for added complexity.
How To Remove Car Trim Adhesive - EDSC
Door color everydayshowcar.com
adhesive uncovered badges horrible mouldings removed trims ve
Adhesive uncovered badges horrible mouldings removed trims ve. How to remove adhesive from car paint – remove glue easily!. 7+ quick ways to remove adhesive from a car. Paint and glue remover – sminkespeil. How to remove adhesive from a car easily?. Adhesive tipsbulletin. Adhesive damaging surface. How to remove car trim adhesive. How to remove adhesive from car paint – now you know. How to remove glue on car paint. How to remove sticker from car paint. Most reliable best product to remove adhesive from car paint. How to remove adhesive from car paint